

Biking Guide
Road Bikes
The Frame Geometry:
Road frames are designed to make you aerodynamic and hyper-responsive. They feature a short wheelbase (the distance between the wheels) and a steep "head tube angle" (the angle of the front fork). This makes the steering incredibly fast and twitchy—perfect for dodging a pothole at 30 mph, but terrifyingly unstable on loose dirt. The frame forces the rider into a low, stretched-out posture to hide from the wind.
The Components:
- Drivetrain: Almost exclusively a 2x (Double) system with two large chainrings in the front and a tightly spaced cassette in the back. This gives riders a massive top speed and allows them to shift in very tiny increments to maintain the perfect pedaling rhythm on pavement.
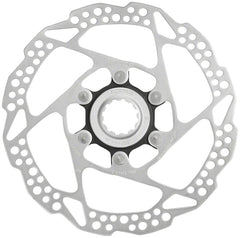
- Brakes: Lightweight hydraulic disc brakes or traditional rim brakes. The brake rotors are usually small (140mm to 160mm) to save weight, as massive stopping power isn't needed on smooth, predictable pavement.
Mountain Bikes (MTB)
Built to survive harsh impacts, jump over obstacles, and find traction in mud, rocks, and loose dirt.
The Frame Geometry:
Mountain bike frames prioritize stability and survival. They feature a long wheelbase and a "slack" head tube angle (pushing the front wheel far out in front of the handlebars). This prevents the rider from flipping over the handlebars when riding down steep, rocky drops. The bottom bracket (where the pedals attach) is raised higher off the ground so the pedals don't smash into rocks.
Identifying Features: Wide, flat handlebars for maximum steering leverage, massive knobby tires (2.2" to 3.0" wide), and suspension systems to absorb impacts.
- Hardtail: Has a suspension fork in the front but a rigid frame in the rear. Lighter, cheaper, and more efficient for climbing smooth dirt.Full-Suspension: Has shock absorbers in both the front and the rear. Necessary for aggressive downhill trails, large drops, and high-speed rock gardens.
- Best For: Singletrack trails, off-road exploring, and extreme downhill riding.
- Limitations: Because of the heavy suspension and thick tires, they are exhausting and slow to pedal on paved roads.
Brakes: Oversized hydraulic disc brakes. Downhill and enduro MTBs use massive metal rotors (200mm to 220mm) and 4-piston brake calipers designed to dissipate the extreme heat generated when hauling a heavy bike to a stop on a 20% dirt grade.
Dropper Post: A specialized seatpost controlled by a lever on the handlebars that instantly drops the seat down and out of the way so the rider can shift their weight backward on steep descents.
Gravel Bikes
The fastest-growing category in cycling. They combine the speed and drop-handlebars of a road bike with the tire clearance and durability of a mountain bike.
The Frame Geometry:
A gravel frame looks like a road frame, but it is stretched out and relaxed. The wheelbase is longer, the bottom bracket sits lower to drop the rider's center of gravity (making the bike feel planted on slippery gravel), and the frame tubes are often engineered to flex slightly to absorb high-frequency vibrations. Most importantly, the fork and rear frame triangles are built incredibly wide to clear mud and fit larger tires.
- Identifying Features: Looks almost identical to a road bike, but features a slightly longer frame, disc brakes, and room to fit much wider, knobby tires (usually 38mm to 50mm).
- Best For: Riders who want one bike to do everything. They can keep up with road bikes on the pavement, but easily transition to dirt roads, gravel paths, and light singletrack trails. They are also the gold standard for "bikepacking" (off-road camping).
- Limitations: They are a jack-of-all-trades. They aren't quite as fast as a pure road bike on tarmac, and lack the suspension needed for heavy mountain bike trails.
Hybrid / Commuter Bikes
These blend the fast-rolling 700c wheels of a road bike with the flat handlebars and upright seating posture of a mountain bike.
- Identifying Features: Flat handlebars, medium-width tires with light tread, and often equipped with practical accessories like kickstands, fenders (mudguards), and rear cargo racks.
- Best For: Daily commuting, riding to the grocery store, casual weekend rides on paved bike paths, and fitness for riders who prefer an upright, heads-up posture to easily see traffic.
- Limitations: The upright posture acts like a parachute in the wind, making them slower than road bikes over long distances. They are not rugged enough for real off-road trails.
Electric Bikes (E-Bikes)
E-bikes incorporate a battery and an electric motor to assist the rider's pedaling. They exist across all the categories above (e.g., you can buy an electric mountain bike or an electric commuter bike).
- Identifying Features: A thick downtube (which hides the battery) and a motor located either in the center of the pedals (Mid-Drive) or in the center of the rear wheel (Hub-Drive).
- Classes (USA Standard): Class 1: Motor only assists while you are actively pedaling, up to 20 mph. Class 2: Features a throttle (like a motorcycle) so you can move without pedaling at all, up to 20 mph.Class 3: Pedal-assist only, but the motor supports speeds up to 28 mph.
- Best For: Riders with long commutes, older riders, carrying heavy cargo/children, or mountain bikers who want to do more downhill laps without exhausting themselves on the climbs.
The Frame & Fork
The frame is the core structure of the bike. It is typically divided into two "triangles": the front triangle and the rear triangle.
- Top Tube: The horizontal (or slanted) top bar that connects the steering area to the seat area.
- Down Tube: The thickest tube on the bike, connecting the steering area down to the pedals. On e-bikes, this is usually where the battery is housed.
- Seat Tube: The vertical tube extending up from the pedals to the seat.
- Head Tube: The short tube at the very front of the frame that the fork slides through.
- Chainstays & Seatstays: The tubes that form the "rear triangle," connecting the pedals and seat area back to the center of the rear wheel.
- Fork: The two-pronged component that holds the front wheel. It can be rigid (solid metal or carbon) or have built-in suspension shocks (like on mountain bikes).
The Cockpit
These are the parts you physically interact with to steer and sit on the bike.
- Handlebars: The bar you hold to steer. They come in flat, curved (riser), or curled (drop) shapes.
- Stem: The short metal bracket that clamps the handlebars to the top of the fork. Changing its length directly impacts how far you have to reach forward.
- Headset: The hidden set of bearings inside the head tube that allows the fork and handlebars to rotate smoothly left and right.
- Saddle: The seat.
- Seatpost: The metal or carbon tube attached to the saddle that slides down into the frame's seat tube, allowing you to adjust the seat height.
The Drivetrain
This system transfers the power from your legs to the rear wheel.
- Crankset (and Crank Arms): The levers your pedals attach to, and the large front gears (chainrings) they turn.
- Bottom Bracket: The hidden set of bearings housed inside the frame exactly where the crank arms meet. This allows the pedals to spin smoothly.
- Cassette: The stack of different-sized gears attached to the center of the rear wheel.
- Derailleur (Rear & Front): The robotic-looking arm mechanisms that physically push the chain up and down the gears when you hit the shifter on your handlebars.
The Wheels
The wheel itself consists of a few distinct parts before the tire is even mounted.
- Hub: The metal cylinder in the exact center of the wheel containing the axle and bearings. It allows the wheel to spin freely.
- Spokes: The thin metal rods connecting the central hub to the outer rim. They create structural tension to keep the wheel perfectly round and strong.
- Rim: The outer metal (or carbon) hoop that the tire mounts onto.
- Valve: The small metal nozzle extending through the rim where you attach your pump.

Click Here for Tires
Every bicycle tire size is written as two numbers: Diameter x Width (e.g., 700x28c or 29x2.4"). The diameter must exactly match the bike's wheels, but the width is where customers can customize their ride.
Road & Pavement (Measured in Millimeters)
These tires fit standard 700c road wheels and are designed for speed, efficiency, and paved surfaces.
- 23mm – 25mm (Racing): The narrowest modern tires. Built for pure speed and aerodynamics on flawlessly smooth tarmac. They require high pressure and sacrifice vibration damping.
- 28mm – 30mm (Modern Road Standard): The current sweet spot for most road cyclists. They offer vastly improved comfort, better cornering grip, and roll just as fast as narrower tires on real-world pavement.
- 32mm – 35mm (Endurance & All-Road): Best for riders prioritizing comfort on long days or those frequently navigating rough country roads, chip-seal, and occasional hardpack dirt.
City, Hybrid & Commuting
Designed for durability, puncture resistance, and handling the unpredictable terrain of urban environments.
- 35mm – 38mm (Fast Urban): Great for fitness bikes and fast commuters. They roll easily on bike paths while providing enough air volume to take the edge off small bumps.
- 40mm – 45mm (Heavy Commuter / E-Bike): Built for comfort and durability. This width easily absorbs pothole impacts, curb drops, and broken pavement without risking rim damage. Often heavily armored against glass and debris.
Gravel & Bikepacking
Designed to bridge the gap between fast pavement riding and aggressive off-road trails.
- 38mm – 42mm (Fast Gravel): Ideal for hardpack dirt, light gravel, and riders who split their time 50/50 between paved roads and dirt trails.
- 45mm – 50mm (Adventure Gravel): Built for loose, chunky gravel, deep ruts, and bikepacking. The massive air volume provides essential suspension for bikes without shocks.
Mountain Bike (Measured in Inches)
Mountain bike tires focus on traction, cornering bite, and impact absorption over rocks and roots.
- 2.0" – 2.25" (Cross-Country / XC): Lightweight and fast-rolling. Designed for climbing efficiency, smooth singletrack, and hardpack dirt trails.
- 2.3" – 2.6" (Trail & Enduro): The most common mountain bike size. These provide a wide contact patch for aggressive cornering, heavy braking, and navigating wet roots and loose rock.
- 2.8" – 3.0" (Plus Size): Massive volume for extreme traction and stability. Great for beginners building confidence, hardtail (unsuspended) bikes, or riding in loose sand and mud.
- 3.8" – 5.0" (Fat Bike): Specialty tires designed to be run at extremely low pressures (5-10 PSI) to float over deep snow, soft beach sand, and bogs.
Click Here for Tubes
Choosing the correct inner tube requires matching three things to your existing wheel: the valve type, the size, and the material. Getting any of these wrong will mean the tube either won't fit through the rim, won't inflate, or will pop instantly.
Here is how to decode bicycle tubes.
The Valve Type
There are two primary valve types used on bicycles today. You must buy the one that matches the hole drilled into your wheel's metal rim.
Presta Valve (Skinny & Lockable). Source: PatrikSlezak / Getty Images Schrader Valve (Car Tire Style). Source: Wirestock / Getty Images
- Presta Valve: These are tall, skinny metal valves found on almost all modern road, gravel, and mountain bikes. Because they are narrow, they require a smaller hole in the rim, which makes the wheel stronger. How to use: Before you can pump air into a Presta valve, you must unscrew the tiny metal knurled nut at the very top. Once inflated, you screw it back down to lock the air in.
- Schrader Valve: This is the exact same wider, spring-loaded valve found on car tires. They are common on older bikes, entry-level hybrids, BMX bikes, and children's bikes. How to use: They are simple to use—just press the pump head on and flip the lever. You can also inflate these at any gas station air compressor.
Valve Compatibility Warning
A skinny Presta valve will technically fit into a wider Schrader rim hole, but it will wobble and eventually slice the rubber base, causing a flat. A wide Schrader valve will not fit into a Presta rim hole at all. Always buy an exact match.
Finding the Right Size
Tube sizes correspond directly to the tire sizes covered earlier in this guide (Diameter x Width). However, because tubes are made of stretchy rubber, they cover a range of widths.
- Step 1: Match the Diameter Exactly. If your tire says 700c (or 29", 27.5", 26"), you must buy a tube with that exact diameter.
- Step 2: Match the Width Range. Look at the width printed on your tire (e.g., 700x32c). You need a tube where your tire width falls inside its stated range. For example, a tube labeled 700 x 28-35c is the perfect fit for a 32c tire.
- Step 3: Check Valve Length. If you have "deep dish" aerodynamic carbon road wheels, you must buy a tube with a long enough valve stem (e.g., 60mm or 80mm) to poke through the deep rim so you can attach a pump.
Tube Materials
For decades, tubes were only made of one material. Today, riders have options to upgrade their speed and save weight without changing their tires.
- Butyl (Standard Black Rubber): The most common tube material. They are cheap, highly durable, and hold air for a long time before needing to be topped up. This is what comes installed on 95% of new bikes.
- TPU (Thermoplastic Polyurethane): The newest technology, often bright orange, yellow, or clear. TPU tubes are insanely lightweight (up to 70% lighter than standard tubes) and pack down so small they take up virtually no room in a saddlebag. They offer speed similar to latex but hold air much better. The only downside is their high cost.
Click Here For Wheels
Unlike tire width, which offers some room for customization, your wheel diameter is hardwired to your bike's frame and fork. You generally cannot put a 29" wheel into a bike built for a 26" wheel.
However, understanding what these sizes mean helps customers buy the right style of bike from the start. Here is a breakdown of the standard wheel sizes and what they are built to do.
Road, Gravel & Commuter (Measured in Millimeters)
These sizes use traditional French metric naming and are found on bikes meant primarily for pavement and dirt roads.
- 700c (The Global Standard): Found on 99% of adult road bikes, fitness hybrids, and most gravel bikes. This large diameter is optimized for rolling efficiency, top speed, and maintaining momentum on open roads. It offers the largest selection of replacement tires on the market.
- 650b (The Adventure Alternative): A slightly smaller diameter than 700c. It has become incredibly popular on gravel bikes and smaller road frames. Because the wheel is smaller, it leaves extra room in the frame to install a much fatter, cushier tire. It is the go-to size for riders who want mountain-bike levels of comfort on a drop-bar gravel bike, or for shorter riders who want to avoid their toes hitting the front tire when turning.
Mountain Bike (Measured in Inches)
Mountain bike wheels are measured in inches. Interestingly, modern MTB rims share the exact same diameters as road rims, but are built much wider and stronger to support massive tires.
- 29" / 29er (The Fast Roller): The dominant modern mountain bike size (shares the same rim diameter as 700c). Because the wheel is so large, it attacks rocks, roots, and drops at a shallower angle, rolling over obstacles with much less effort. They carry speed beautifully and are the gold standard for cross-country racing and aggressive trail riding.
- 27.5" (The Playful Option): The exact same rim diameter as 650b. Smaller than a 29er, these wheels accelerate quicker and are easier to maneuver. They are favored by riders who love hitting jumps, throwing the bike around in the air, or navigating extremely tight, twisty woodland trails.
- 26" (The Classic): For decades, this was the undisputed standard for all mountain bikes. Today, the industry has moved past it for trail riding, but 26" wheels are still heavily used for specialized dirt-jump bikes, slopestyle bikes, older used MTBs, and youth bikes. They are incredibly strong and agile.
Urban, BMX & Youth
Smaller wheels prioritize strength, compact sizing, and quick handling.
- 24": The transitional size for older children and young teens before they move up to a full adult frame. Also used in some specialized cruiser and dirt jump bikes.
- 20": The absolute standard for BMX riding and freestyle park bikes because the small diameter makes them virtually indestructible. Also heavily used for folding commuter bikes (like Bromptons) so they can pack down small enough to carry onto a train or fit under a desk.
Click Here for Drivetrain Parts
The drivetrain is your bike's engine room, dictating how easily you can climb hills and how fast you can pedal on flats. Paired with the right brakes and cockpit, these components define how the bike handles, stops, and feels underneath you.
The Drivetrain: Gears & Shifting
The drivetrain consists of the pedals, cranks, chainrings (front gears), cassette (rear gears), and the derailleurs that move the chain between them. The biggest choice customers make today is how many chainrings are in the front.
- 1x (One-By) Drivetrains: This system uses a single chainring in the front and a massive cassette in the back (often 11 or 12 speeds). It is the absolute standard for mountain bikes and heavily favored for gravel and commuter bikes. By removing the front derailleur, the bike drops weight, becomes easier to shift (only one lever to think about), and drastically reduces the chance of the chain falling off on rough terrain.
- 2x (Double) Drivetrains: This system uses two chainrings in the front. It remains the gold standard for road bikes. While a 1x setup can offer a similar total range of easy-to-hard gears, a 2x system offers much tighter "steps" between those gears. This allows a road cyclist to find the absolute perfect gear to maintain their exact pedaling cadence.
- 3x (Triple) Drivetrains: This system uses three chainrings in the front. It requires the rider to actively manage both the front and rear derailleurs to find the right gear without causing mechanical issues. The front three chainrings act as "ranges," while the rear gears act as the fine-tuners within that range.
- Electronic vs. Mechanical: Traditionally, shifting is done by pulling a steel cable that physically moves the derailleur. Electronic shifting (like Shimano Di2 or SRAM AXS) uses wireless signals and small motors to move the derailleur. It offers perfectly precise, effortless shifting every time and requires virtually no maintenance, but comes at a significant price premium.
- The Smallest Ring: This is strictly for climbing steep hills. When the chain is on this ring, pedaling is incredibly easy, but your top speed will be very low.
- The Middle Ring: This is where you should spend 80% of your time. It is designed for flat terrain, rolling hills, and general riding.
- The Largest Ring: This is strictly for high-speed descending or sprinting on flat pavement. It requires the most leg strength to turn.
Brakes: Stopping Power
How a bike stops is just as important as how it goes. The industry has seen a massive shift in braking technology over the last decade.
- Hydraulic Disc Brakes: The modern standard for mountain, gravel, and mid-to-high-end road bikes. They use fluid (like a car's brakes) to squeeze pads against a metal rotor attached to the wheel hub. They offer incredible stopping power with minimal finger effort and perform flawlessly in rain and mud.
- Mechanical Disc Brakes: These look similar to hydraulic brakes but use a traditional steel cable to squeeze the rotor. They are cheaper and easier to repair on the side of the road, but require more hand strength to pull and need periodic adjustment as the cable stretches.
- Rim Brakes (Caliper/V-Brakes): These squeeze rubber pads directly against the rim of the wheel. They are incredibly lightweight, very cheap, and easy to maintain. They are still found on entry-level bikes, retro builds, and ultra-lightweight climbing road bikes, but their stopping power decreases significantly in wet weather.
The Cockpit: Handlebars & Control
The handlebars dictate your body position, aerodynamics, and leverage over the front wheel.
- Flat / Riser Bars: A straight (or slightly curved upward) bar used on mountain bikes, hybrids, and city commuters. They force the rider into an upright, heads-up position that is comfortable and provides excellent visibility in traffic. Because they are wide, they offer massive leverage to muscle the bike through rough terrain.
- Drop Bars: The curled handlebars found on road and gravel bikes. They offer three distinct hand positions: the "hoods" for cruising, the "drops" (the lower curved section) for sprinting and descending with maximum aerodynamics, and the "tops" for climbing. They are narrower than flat bars, prioritizing speed and efficiency over low-speed leverage.
Click Here for Shifters
The mechanics of shifting depend entirely on the style of handlebars and the brand of the components.
Before looking at specific shifters, there is one universal rule for almost all geared bicycles: The right hand controls the rear gears (fine-tuning your pedaling effort), and the left hand controls the front gears (making massive jumps for steep hills or fast descents).
Here is how to operate the most common shifting systems on the market today.
Flat Bar Shifters (Mountain, Hybrid & City Bikes)
- Trigger Shifters (Shimano & SRAM): The most common shifter in the world. It features two levers sitting underneath the handlebar, operated by your thumb and index finger.To shift to an easier gear (climbing): Push the larger lower lever forward with your thumb. You can often push it deeply to shift multiple gears at once.To shift to a harder gear (speed): Click the smaller upper lever. On SRAM systems, you push it forward with your thumb. On Shimano systems, you can either push it with your thumb or pull it backward like a trigger with your index finger.
- Grip / Twist Shifters: Often found on entry-level bikes, children's bikes, or specific SRAM mountain bike setups. The inner part of the rubber handgrip rotates.To shift: You simply twist the grip backward (toward you) or forward (away from you) to move up and down the gears. Numbers on a dial usually indicate which gear you are in.
Drop Bar Shifters (Road & Gravel Bikes)
Modern drop-bar bikes combine the brake lever and the gear shifter into a single unit, allowing you to brake and shift without moving your hands. Every brand solves this engineering challenge differently.
- Shimano (Dual Control / STI):To shift to an easier gear: Push the entire brake lever inward toward the center of the bike.To shift to a harder gear: Push the smaller secondary lever (nestled directly behind the main brake lever) inward.
- SRAM (DoubleTap): The brake lever is fixed and only pulls backward to stop. All shifting is done by a single paddle nestled behind the brake lever.To shift to a harder gear: Push the paddle inward a short distance until you hear one solid click, then release.To shift to an easier gear: Push the exact same paddle inward further, sweeping past the first click until you hear a second (or third) click, then release.
- Campagnolo (ErgoPower): Features a brake lever, a shift lever, and a thumb button on the inside of the hood.To shift to an easier gear: Push the paddle sitting behind the brake lever inward.To shift to a harder gear: Press the thumb button located on the inside of the rubber hood (pointing toward the opposite lever) downward.
Electronic Shifters
Electronic shifting replaces steel cables with wires or wireless signals. The derailleur is moved by a tiny motor rather than physical tension from your hand.
- How it works: Regardless of the brand (Shimano Di2, SRAM AXS, or Campagnolo EPS), physical levers are replaced by buttons. You do not need to "sweep" or push hard; a light tap on a button instantly changes the gear.
- SRAM AXS specifically: Takes a unique approach. Pressing the right-hand button makes the rear gear harder. Pressing the left-hand button makes the rear gear easier. Pressing both buttons simultaneously shifts the front gear.
Classic & Touring Shifters
- Bar-End Shifters: Mounted directly into the open ends of a drop handlebar. You operate them by pushing or pulling the lever up and down. They are incredibly robust and favored by global bicycle tourists because there are very few moving parts to break.
- Downtube Shifters: The original standard for vintage road bikes. The levers are mounted directly to the frame tube between your knees. To shift, you must take one hand off the handlebars, reach down, and pull or push the lever.
Click Here for Maintenance Products
To maintain a bike properly, you need the right tools and specific chemicals. Avoid using household hardware tools (like adjustable wrenches) which can strip delicate bicycle bolts, and never use WD-40 as a chain lubricant.
Essential Bike Maintenance Tools & Products
Core Tools:
- Hex Wrench (Allen Key) Set: You will need metric sizes from 2mm to 10mm. These fit almost every bolt on a modern bicycle.
- Floor Pump with Gauge: Essential for hitting accurate tire pressures to prevent flats and improve ride quality.
- Torque Wrench (Crucial): Bicycles have very specific tightening limits (measured in Newton-meters or Nm). A torque wrench prevents you from crushing expensive carbon fiber parts or snapping aluminum bolts.
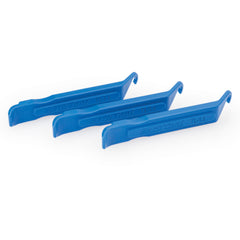
- Tire Levers: Plastic levers used to pry the tire off the rim when fixing a flat.
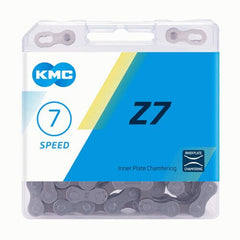
- Chain Checker Tool: A small metal gauge that drops between the links to measure how far your chain has physically stretched over time.
Products & Chemicals:
- Chain Lube: Use bicycle-specific lubricant. Choose Dry Lube for dry/dusty conditions (it goes on wet and dries to a wax that repels dirt) or Wet Lube for rain and mud (it stays wet to repel water but attracts dirt).
- Drivetrain Degreaser: A heavy-duty solvent used with a stiff brush to melt thick black grease off your chain and gears.
- Isopropyl Alcohol: The safest chemical for cleaning dirty disc brake rotors without leaving a residue.
Brake Contamination Hazard
Never let chain lube, degreaser, or aerosol sprays touch your disc brake rotors or brake pads. Contaminated pads will screech loudly and lose all stopping power, almost always requiring complete replacement.
The Maintenance Schedule
Following a strict schedule prevents massive repair bills later.
1. Pre-Ride: The 60-Second Check
Before every single ride, perform a basic safety check.
- Tires: Squeeze both tires or check them with your pump gauge to ensure they are at the correct pressure.
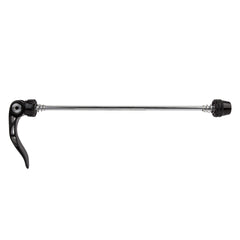
- Wheels: Grab the top of each wheel and rock it side to side to ensure the quick-release or thru-axle is clamped tight.
- Brakes: Pull both brake levers hard and push the bike forward.
- Verification: If the tires are firm, the wheels do not wobble or shift, and the brakes stop the wheels instantly without the levers touching the handlebars, the bike is safe to ride.
2. Weekly: Drivetrain Care
Your chain is the most abused part of the bike. A dirty, dry chain acts like sandpaper, grinding away your expensive gears.
- Wipe: Run the chain backward through a dry, clean rag to remove surface grit.
- Lube: Apply exactly one drop of chain lube to the center roller of every individual chain link. Do not spray it everywhere.
- Settle & Wipe: Backpedal the chain for 30 seconds to work the lube inside the rollers. Then, firmly wipe the outside of the chain with a clean rag to remove all excess lube.
- Verification: A properly lubed chain should look almost dry on the outside and run completely silently when you backpedal.
3. Monthly: Deep Cleaning & Bolt Checks
- Wash: Wash the frame using warm soapy water (or a bike-specific wash) and a sponge. Do not use high-pressure washers, as they force water inside the frame bearings.
- Degrease: Apply degreaser to a stiff brush (an old toothbrush works well) and scrub your chain, rear cassette, and front chainrings until the metal shines. Rinse with water, let dry, and re-apply chain lube.
- Bolt Check: Use your torque wrench to check the tightness of your stem bolts (which hold the handlebars) and the seatpost clamp. The required torque limit (usually 4 to 6 Nm) is almost always printed directly on the part.
- Verification: To test the stem bolts, stand over the bike, clamp the front wheel tightly between your knees, and try to twist the handlebars. If the bars stay perfectly aligned with the wheel, the bolts are secure.
4. Every 6 Months: Wear Checks
- Measure the Chain: Use your chain checker tool. If the tool drops fully between the links, the chain has stretched past its safe limit and must be replaced immediately. If you ride with a stretched chain, it will carve into your cassette and chainrings, forcing you to replace the entire drivetrain.
- Check Brake Pads: Remove your wheels and inspect the brake pads. If the braking material is worn down to less than 1.5mm thick, replace them.
Because e-bikes are heavier, travel at higher sustained speeds, and generate significantly more torque than traditional bicycles, many of their core components require specialized safety certifications.
E-Bike Rated Components & Certifications
- Electrical Systems: The gold standard for e-bike electrical safety is UL 2849. This certification evaluates the entire electrical ecosystem—including the motor, controller, wiring, charger, and display—to ensure components safely interact and mitigate the risk of electrical fires. The battery pack itself is often tested under UL 2271, which evaluates protections against short circuits, overcharging, and thermal runaway.
- Tires: E-bike tires must handle heavy chassis weight and rapid motor acceleration without suffering blowouts. High-speed e-bikes often utilize tires certified to the ECE-R75 standard (a European certification for e-bikes traveling up to 50 km/h), which guarantees thicker casings and reinforced sidewalls.
- Drivetrain (Chains & Cassettes): Mid-drive e-bike motors apply massive pulling force directly to the chain. E-bike-rated chains feature hardened pins and thicker outer plates to prevent stretching and snapping under heavy load.
- Brakes: E-bikes typically require powerful hydraulic disc brakes to safely halt their extra mass. Additionally, e-bike brake levers often contain electronic cut-off switches that instantly kill motor power the moment you squeeze the lever.
Universal Bicycle Components
While the bike industry is famous for its confusing, non-compatible sizing standards (such as varying bottom bracket threads or axle widths), a few components remain universally swappable between e-bikes, mountain bikes, road bikes, and cruisers:
- Pedals: Almost all adult bicycles use a universal 9/16" thread for the pedals. You can freely swap the pedals from a premium electric mountain bike onto a basic commuter bike.
- Saddles (Seats): The twin mounting rails underneath bicycle seats are a universal standard across the industry. Any standard saddle can be clamped into any standard seatpost.
- Handlebar Grips: For flat-bar bicycles, the outer diameter of the handlebar ends is almost universally 22.2mm. Slip-on and lock-on grips can be swapped across all flat-bar bicycle styles.
- Water Bottle Cages: The threaded mounting holes (braze-ons) on bicycle frames are standardized at 64mm apart, allowing any bottle cage to fit onto any equipped frame.
- Tires and Tubes (Dimensionally): As long as you match the exact wheel diameter and stay within the correct width range, an inner tube is interchangeable across all bikes. However, installing thin, non-e-bike rated tires on a heavy electric bike increases the risk of punctures and premature wear.